Enroll in a Payment Plan
This guide provides step-by-step instructions on how to enroll in a payment plan for students and parents. It covers logging into the appropriate portals, selecting the payment plan, setting up automatic payments, choosing a payment method, and confirming the payment. It also provides important alerts and reminders throughout the process. Following this guide will help individuals successfully enroll in a payment plan and ensure their payment is processed correctly.

2. In Raiderlink, select the "MyTech" tab from the left hand side menu and then select "Student Business Services".

3. Under "Student Business Services" select "eBill".

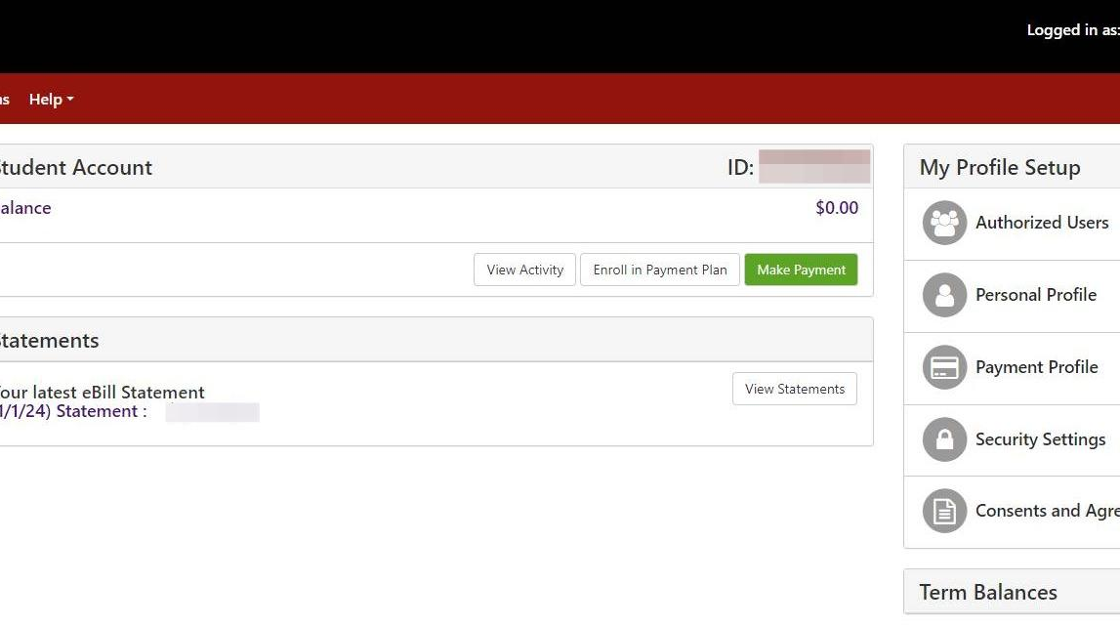
4. The eBill Homepage will open in a new tab.

5. Select "Payment Plans".


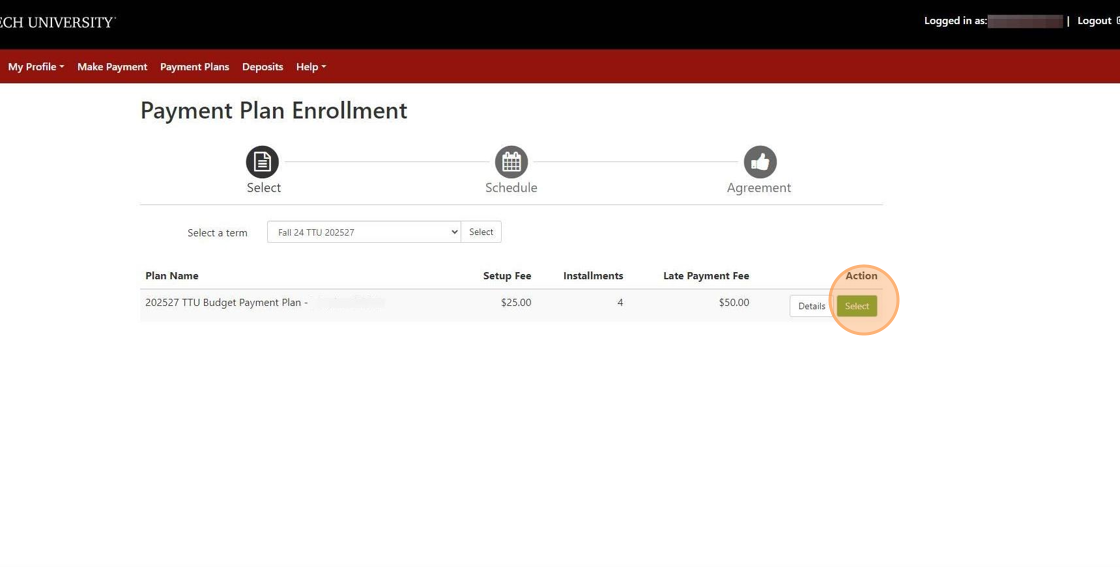
7. Select the appropriate term from the "Select a term" drop-down and click "Select".

8. Available payment plans and a summary overview will be displayed.
You may select "Details" for a full description of the payment plan.
Click "Select" for the desired payment plan.

Alert!
The Emergency Payment Plan opens approximately 10 days prior to the first day of class. If the Emergency Payment Plan is your desired plan, please check back for availability 10 days prior to the first day of class.
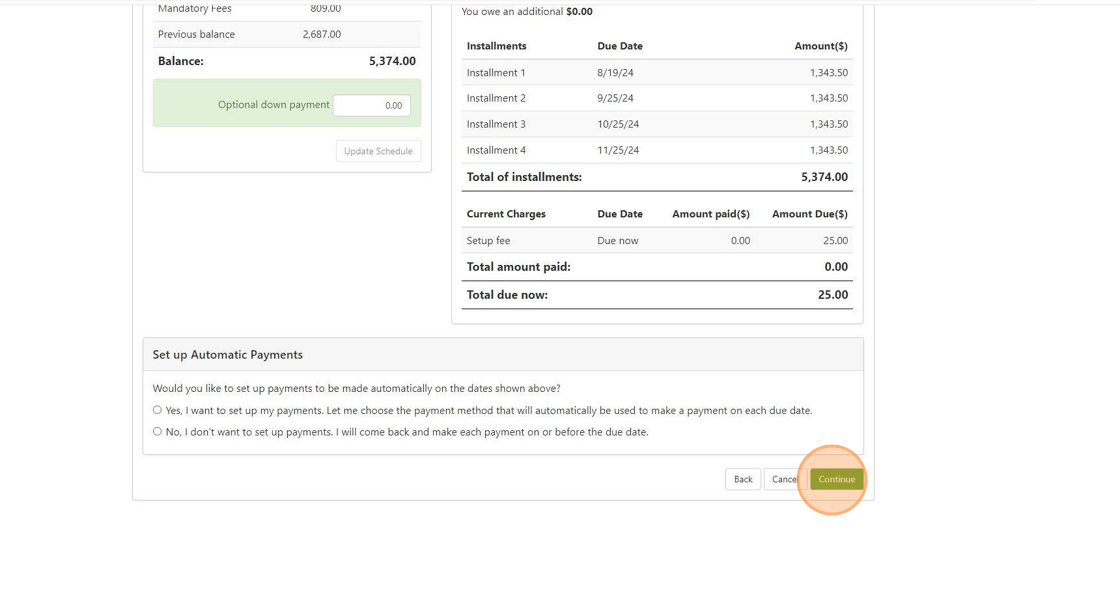
9. You may enter an optional down payment, however, this will not cover the 1st installment. Instead, it will reduce the overall balance & each installment equally.
The payment plan installments will be displayed with dates and amounts.
Make selection for automatic payments & then click "Continue".

Alert!
If you opted to set up automatic payments, the payment amount will be deducted from the payment method used to pay the payment plan enrollment fee on each payment due date.
10. Select a payment method from the drop-down menu.
This payment method will be used for the payment plan enrollment fee, optional down payment, and any installment(s) due at the time of enrollment.


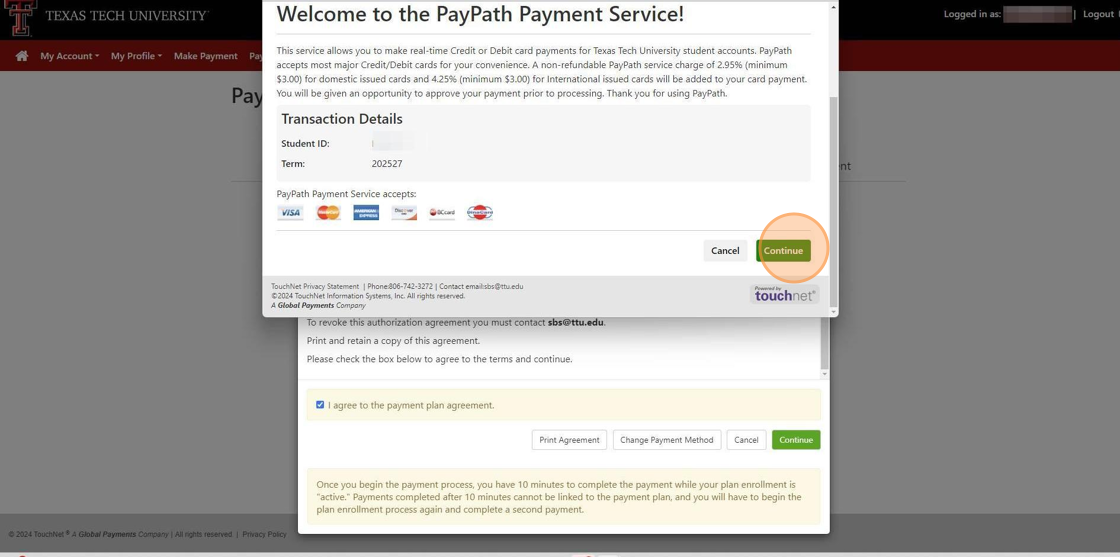
12. The Payment Plan Agreement will be displayed. Review the terms and conditions.
Select the "I agree to the payment plan agreement" button and then select "Continue".

13. Confirm your payment selection and transaction details and select "Continue".
The example below is for the credit card option.
If you choose an Electronic Check or Debit Card option, you will follow the same steps to review the information and select "Continue".

14. Confirm the payment amount and select "Continue".

15. Enter the billing address, email and phone number associated with the payment method being used and select "Continue".

16. Enter the bank information for selected payment method.
Select "Continue".
If the payment is successful, you will receive a confirmation of payment and a receipt.

Alert: If a payment confirmation page and receipt was not received, please navigate to the Payment Plan tab to verify if enrollment was successful or contact Student Business Services.